Getting Started with DevAssure
DevAssure simplifies your testing workflow with AI-powered test case generation and automation.
This guide will help you get started with DevAssure, from creating your account to setting up your organization, project and inviting team members.
Account Signup
To begin using DevAssure, follow these steps:
- You can sign up for an account on requesting a demo.
- Choose one of the following options to create your account:
- Email Signup: Complete the signup form by entering your email address, username, and a secure password.
- Google Login: Click the Sign up with Google button and follow the prompts to connect your Google account.
- Verify your email: Check your email inbox for a verification link and confirm it to activate your account.
- Click the verification link to activate your account and complete the signup process.
Login and Organization Setup
Once your account is verified and activated, an organization and your first project will be created.
-
Log in to the DevAssure account using your credentials or Google login.
-
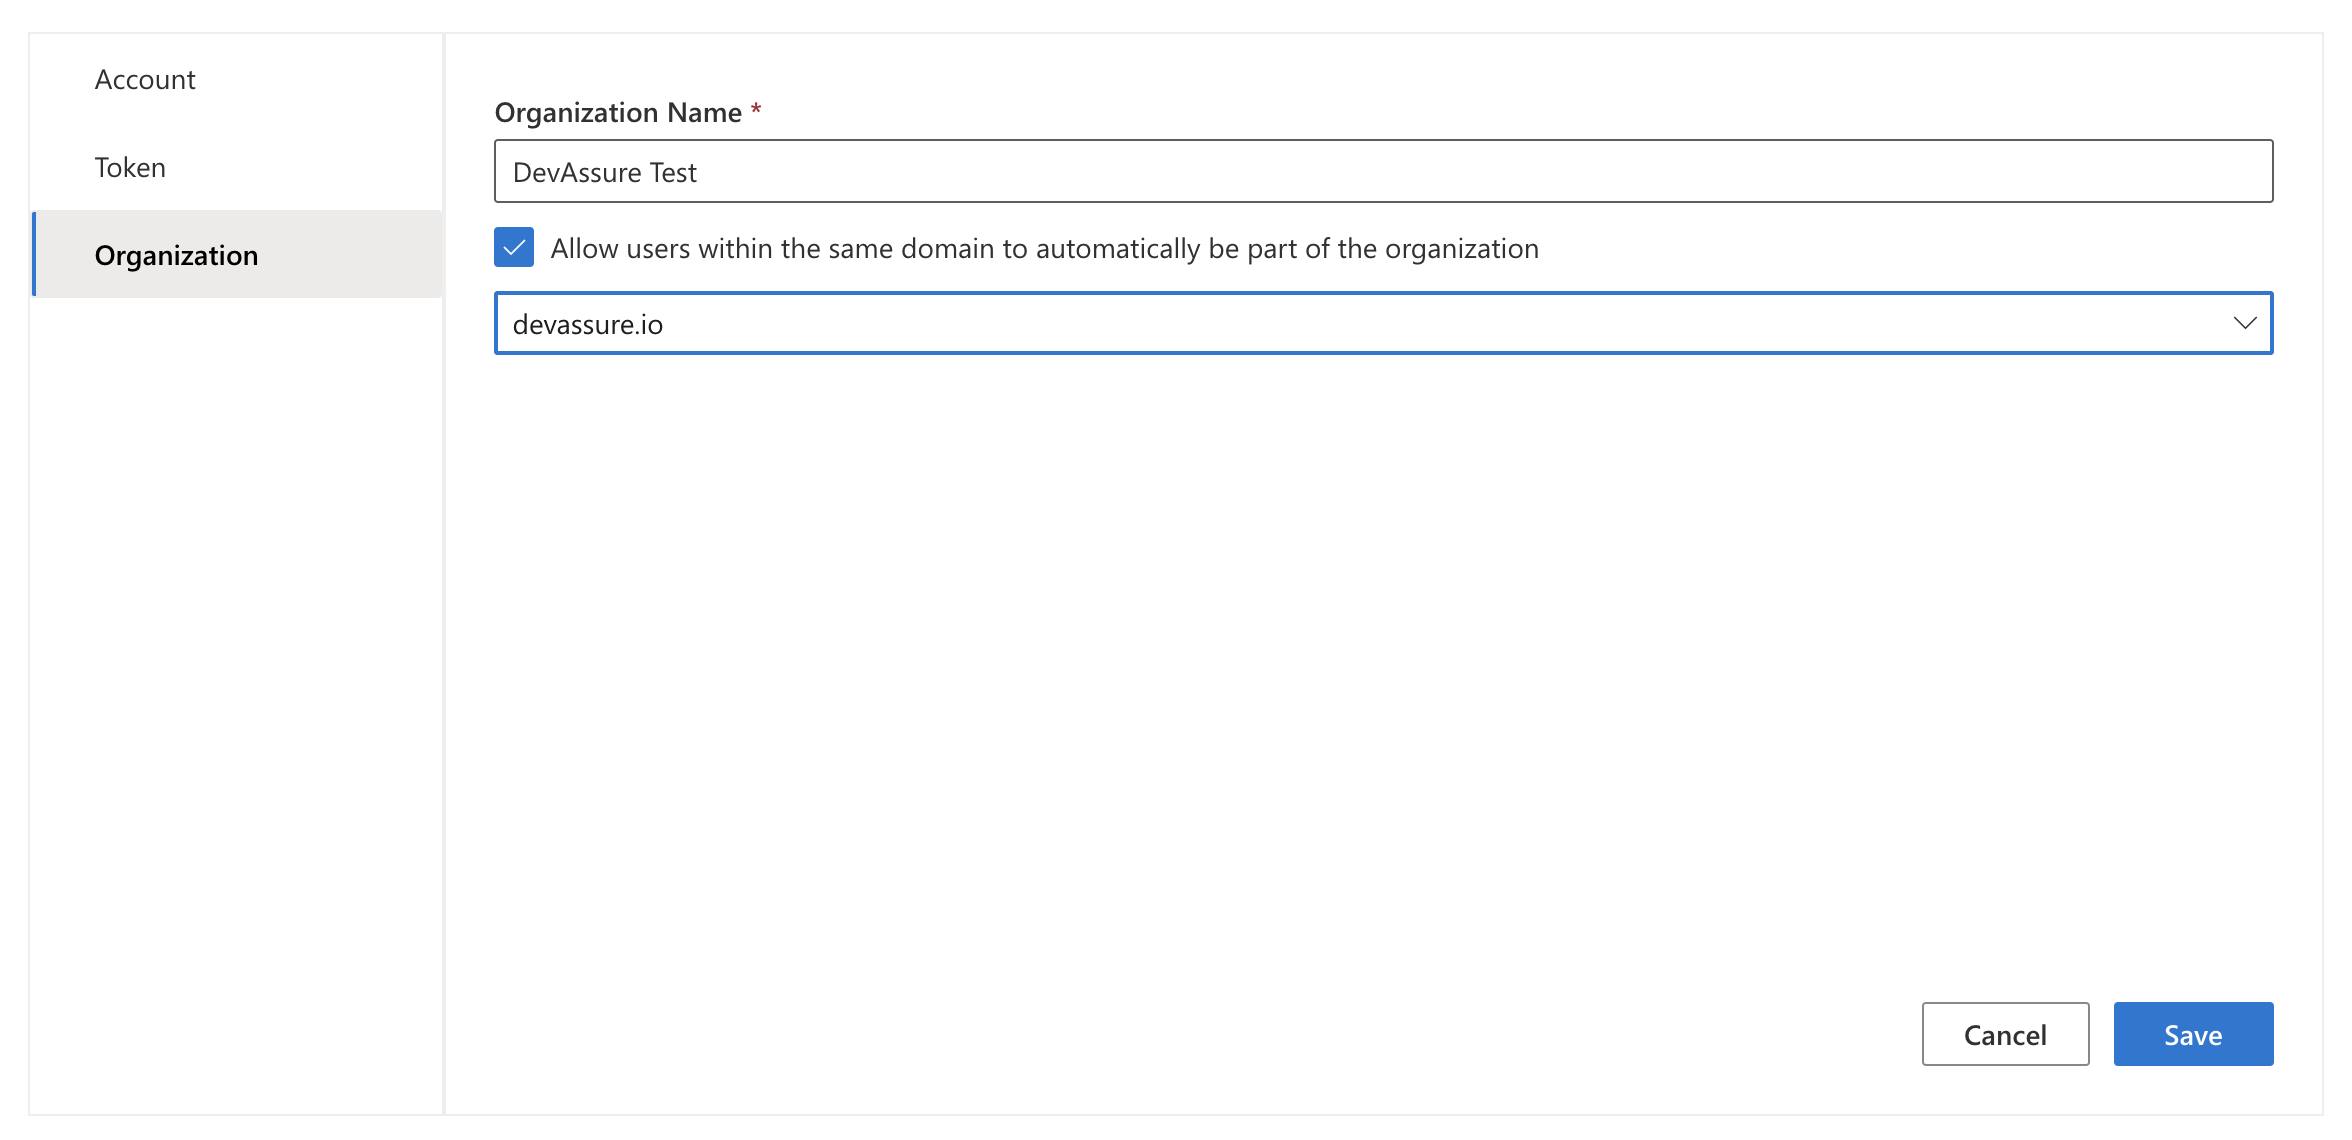
Upon your first login, you'll be prompted to configure your organization details:
- Organization Name: Enter a name for your organization (e.g., "Your Company," "Project XYZ").
- Domain-Based Membership (Optional): Enable this option to automatically include users from your email domain in the organization.
-
Click Save to finalize the setup.
A 10-day free trial period is activated as soon as you sign up.
This trial gives you access to all features of team to explore and evaluate the full potential of DevAssure.
Update organization:
To update your organization's details, follow these steps:
- Click on the profile icon in the top navigation bar and select Settings from the menu.
- Select the organization tab.
- Update the organization name as needed.
- Additionally you can click on the checkbox, to automatically allow users from the same domain to join your organization.
Project
A project is created to organize and manage the users of an organization and testdata they have access to. An organization can own one or multiple Projects.
Once your account is verified and activated, an organization and your first project will be created.
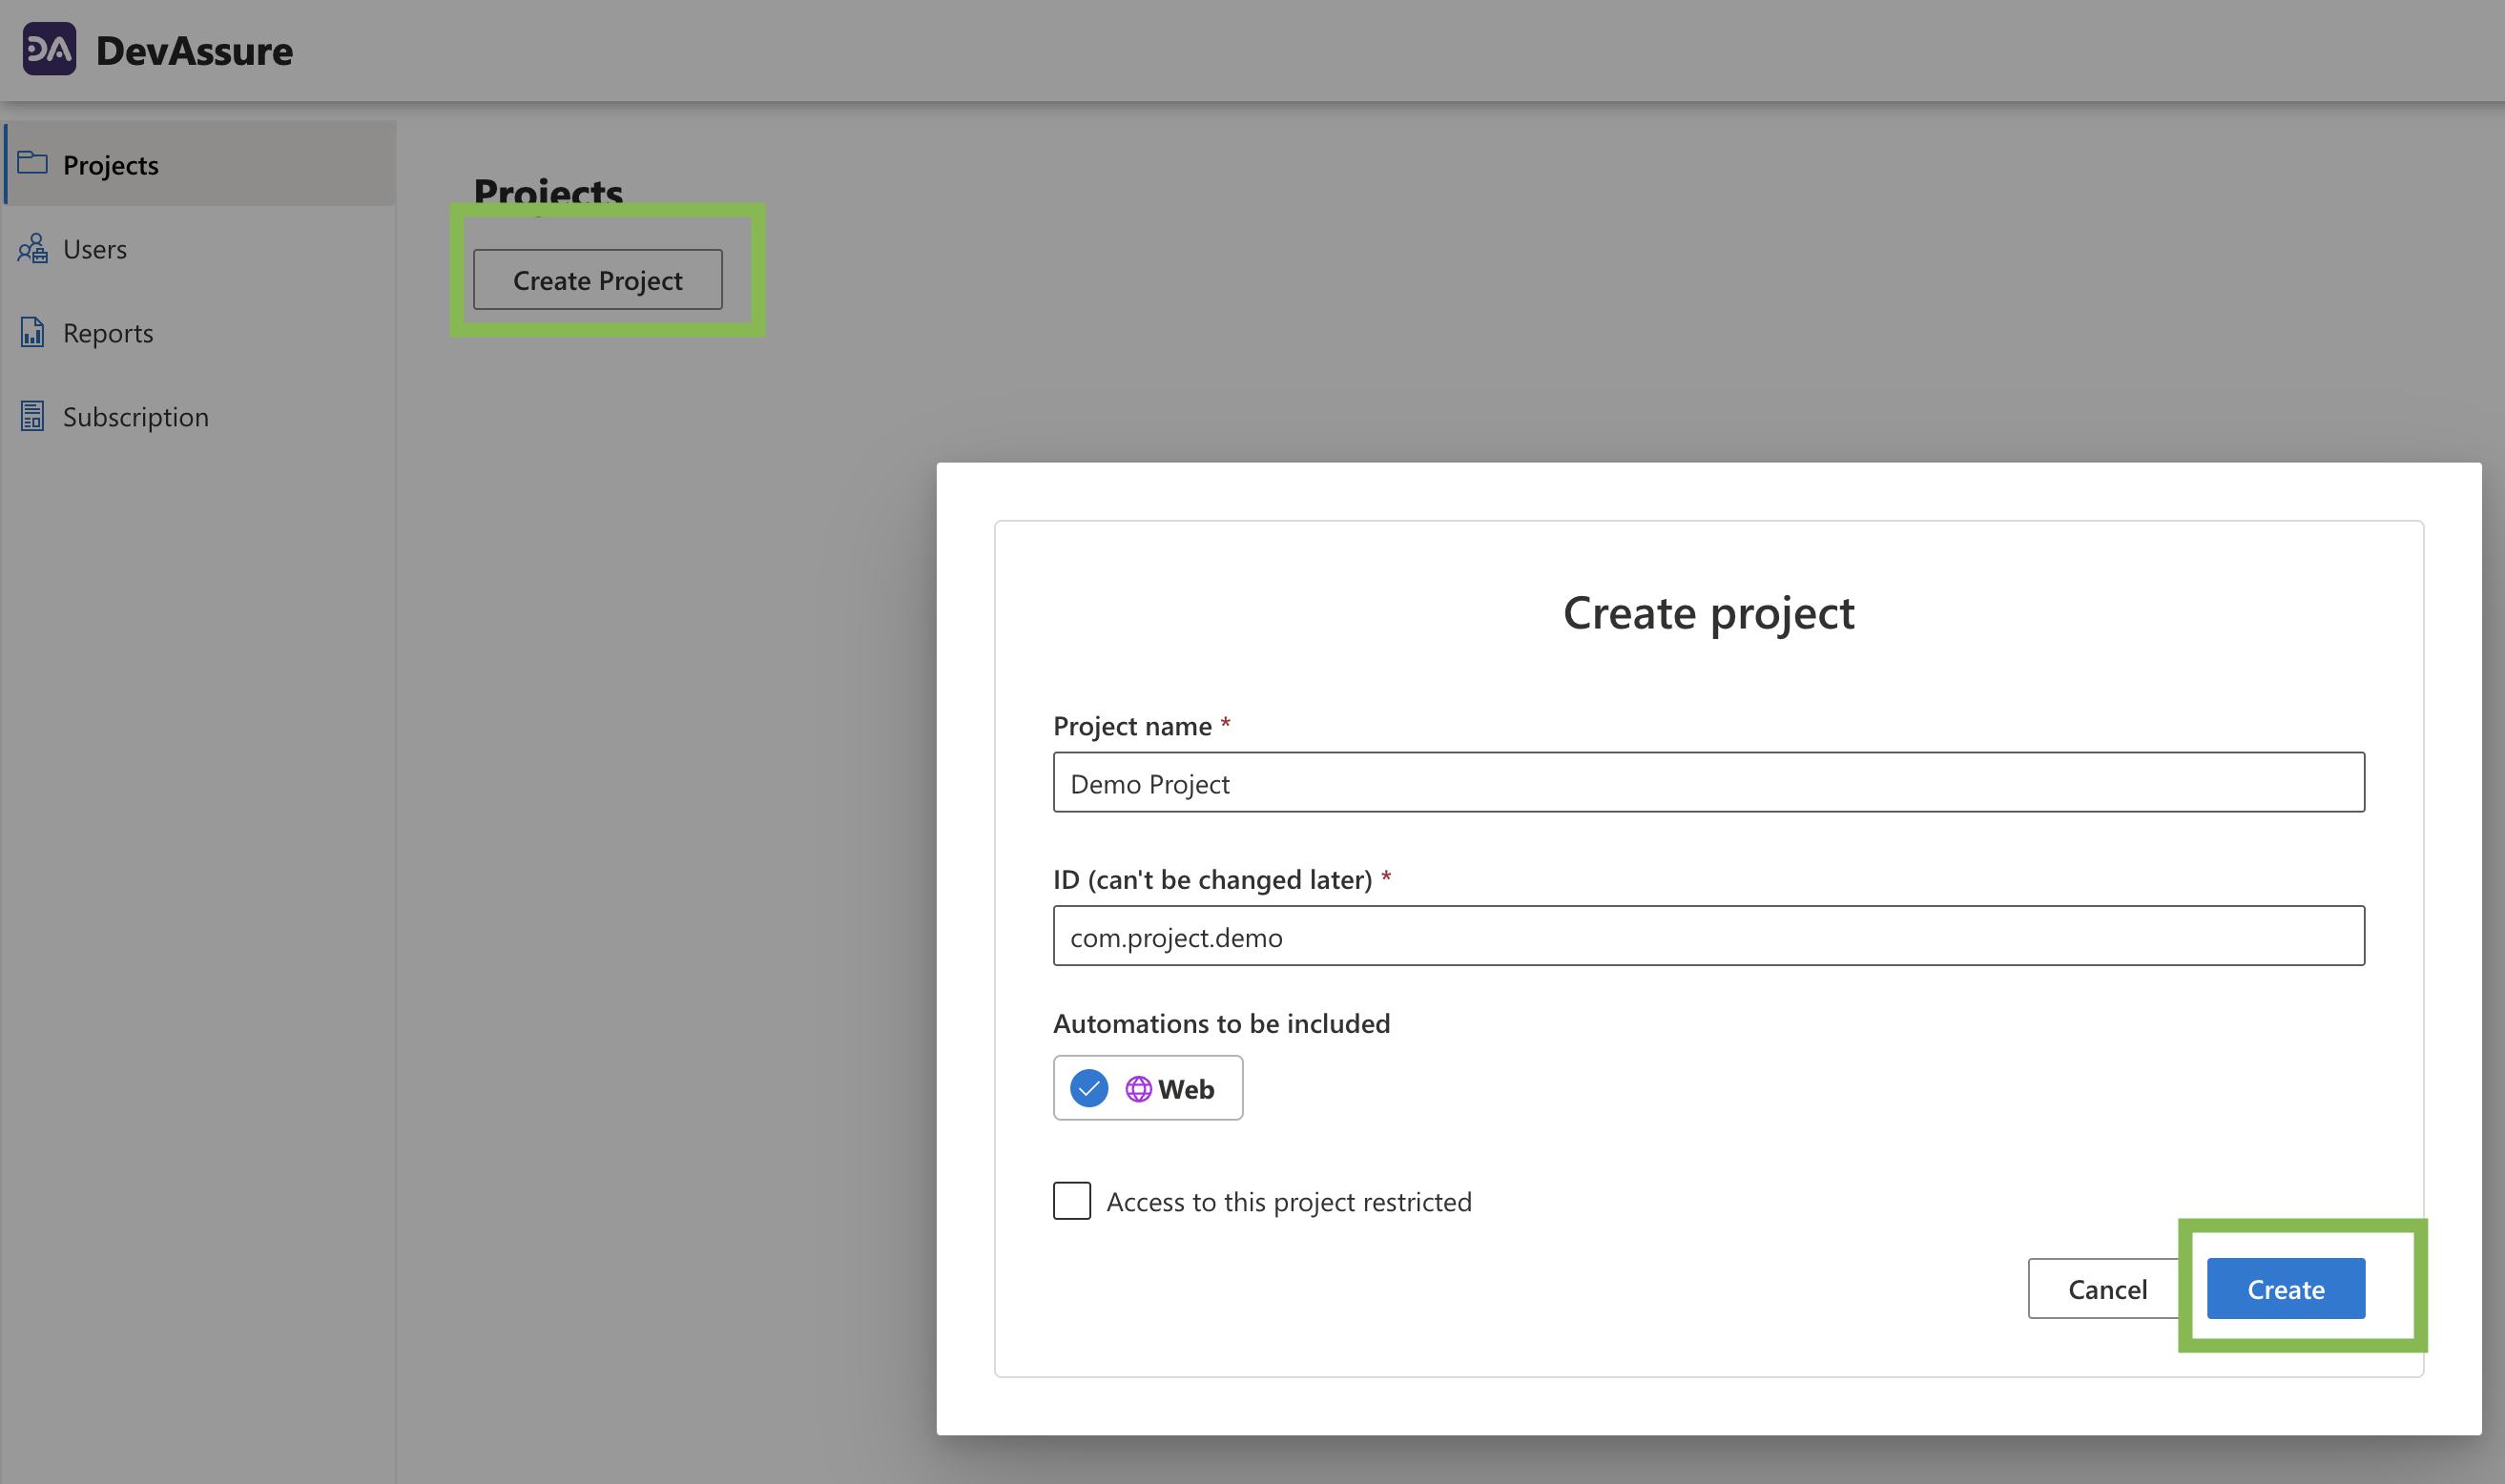
To create a project:
- Click Create Project from Projects in the organization homepage.
- Enter the Project name and ID (unique identifier).The ID is permanent and cannot be changed at a later time.
- Select the automations to be included for the project.
- Click Create. To provide restricted access, add members to the project. Only these members can view and access the projects.

To update a project:
- Hover over the projects in the organization homepage, which has to be updated.
- Click on "Edit " or "Delete" option as required.
- Select the "Edit" option to update the project name / access and automations to be included.

To manage projects (Initialize / Open / Close), please refer documentation here
Invite Users
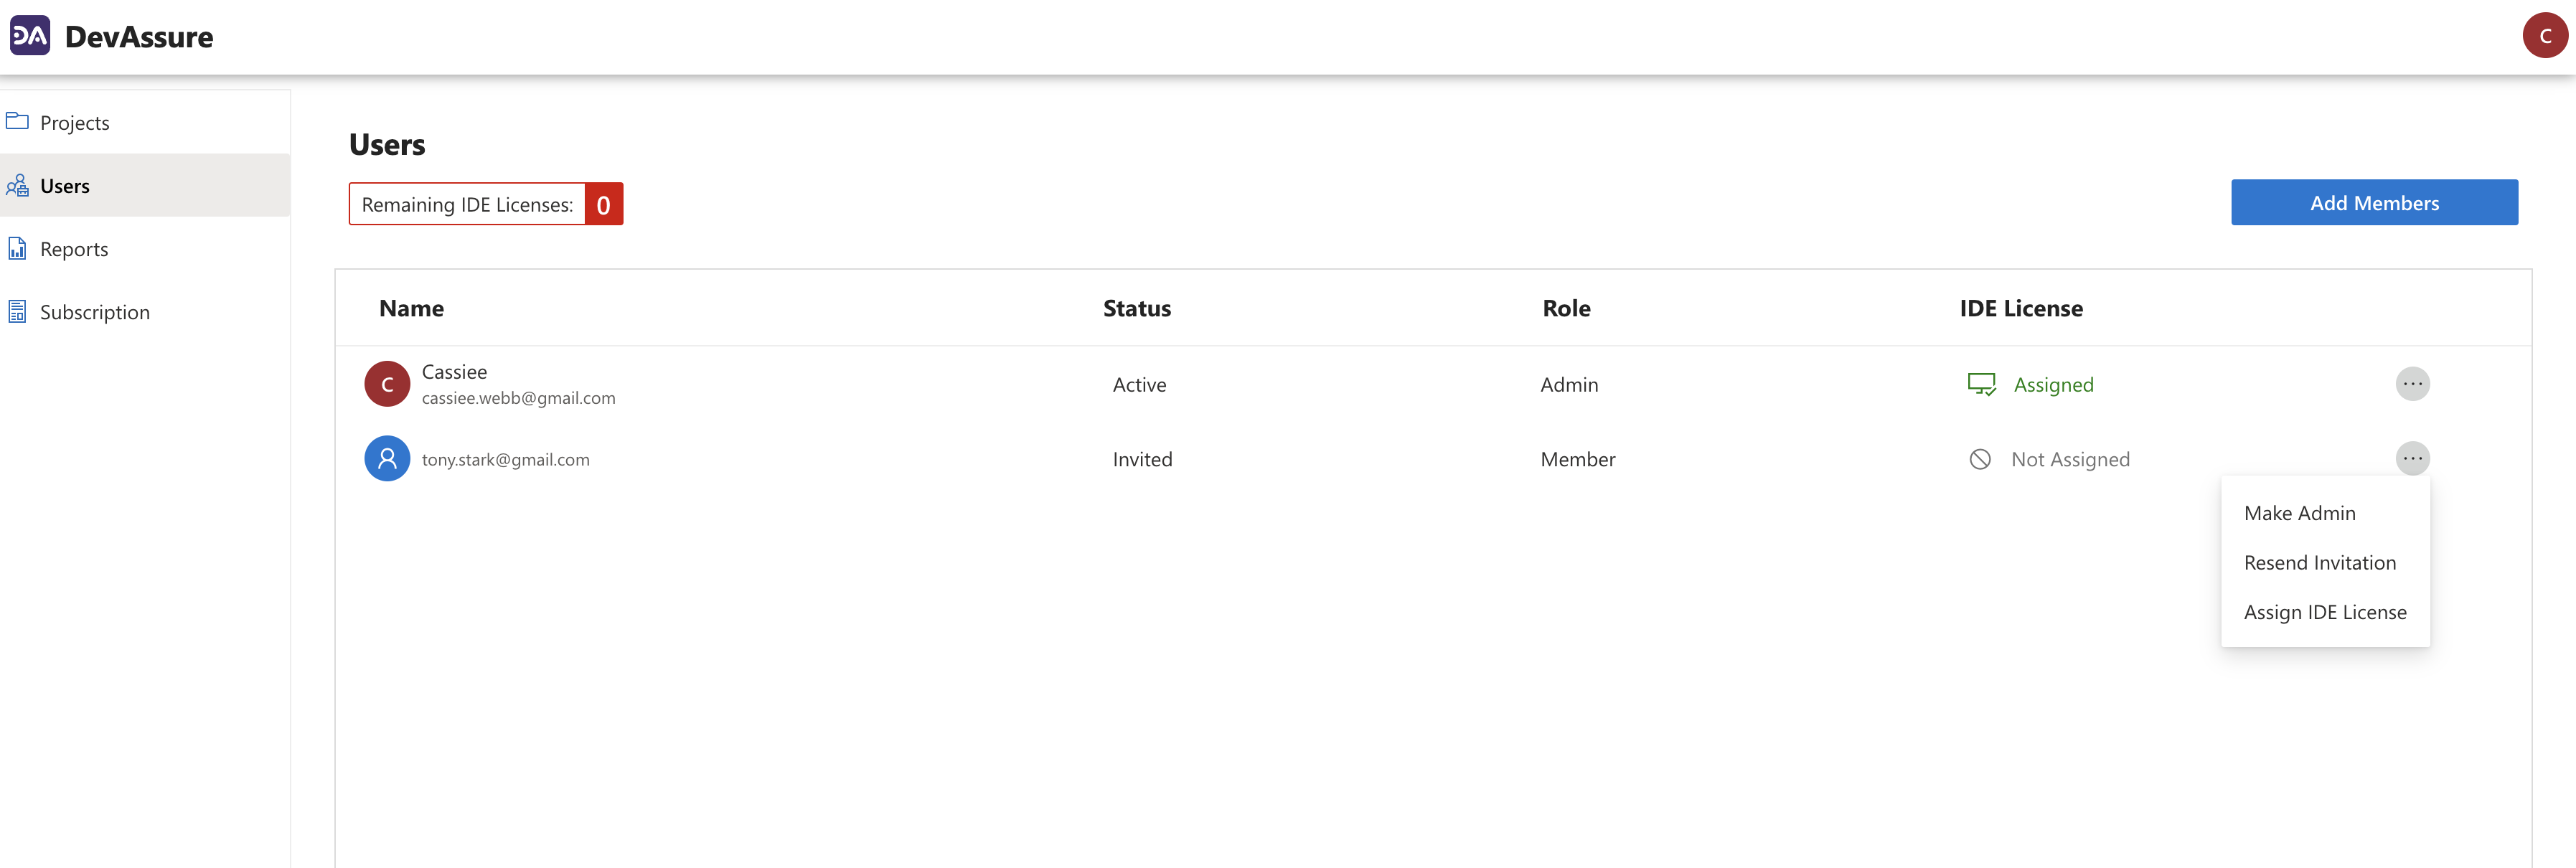
The Users menu in the organization homepage allows users to be added to the organization and provides information on the available licenses.
To add a user:
- Click on the Add Members button.
- Invite multiple users to your organization by entering your users' email addresses under Add member.
- All Users are listed in the Users page with the respective status, role, and the license information.
- To automatically include users from your email domain to be a part of the organization, click on the setting icons and enable the option.
To assign a user license:
- Select the user, click on more actions
 and select Assign IDE License.
 - The IDE license will be updated as Assigned.

You are now ready to start using DevAssure to accelerate your development process and ensure high-quality code.