Visual Tests
Visual testing, also known as visual regression testing, focuses on verifying the visual aspects of a web application. It ensures that the UI's appearance remains consistent across different development stages and doesn't suffer unintended changes. DevAssure allows you to compare screenshots captured during test executions with baseline snapshots, highlighting any visual discrepancies.
This guide provides step-by-step instructions for leveraging DevAssure's visual testing capabilities to ensure your application's Graphical User Interface (GUI) remains consistent across different builds and versions.
Requirements
- You have created a DevAssure account.
- You have created and initialized a Project.
- You have created a new web test case.
Including Visual validation
DevAssure requires a reference baseline snapshot corresponding to the test step for executing visual testing.On first execution, DevAssure will generate this baseline snapshot. Subsequent runs will compare against the reference. You can quickly include visual validations on a web test case with the options below:
Verifying the entire page visually
To visually verify the entire page, it is necessary to capture a snapshot of the page.
- From the Automation tab in editor,click on Add Steps
- Select Visually compare page to (snapshot) test step.
- Provide a label for the snapshot, which will be used to identify the snapshot within your project folder.
- This snapshot serves as a baseline for subsequent test executions, and any variances will be reported.
- Click Run to execute the test case. The captured screenshot will serve as the baseline for future comparisons. Any visual deviations in subsequent executions will be flagged during testing.

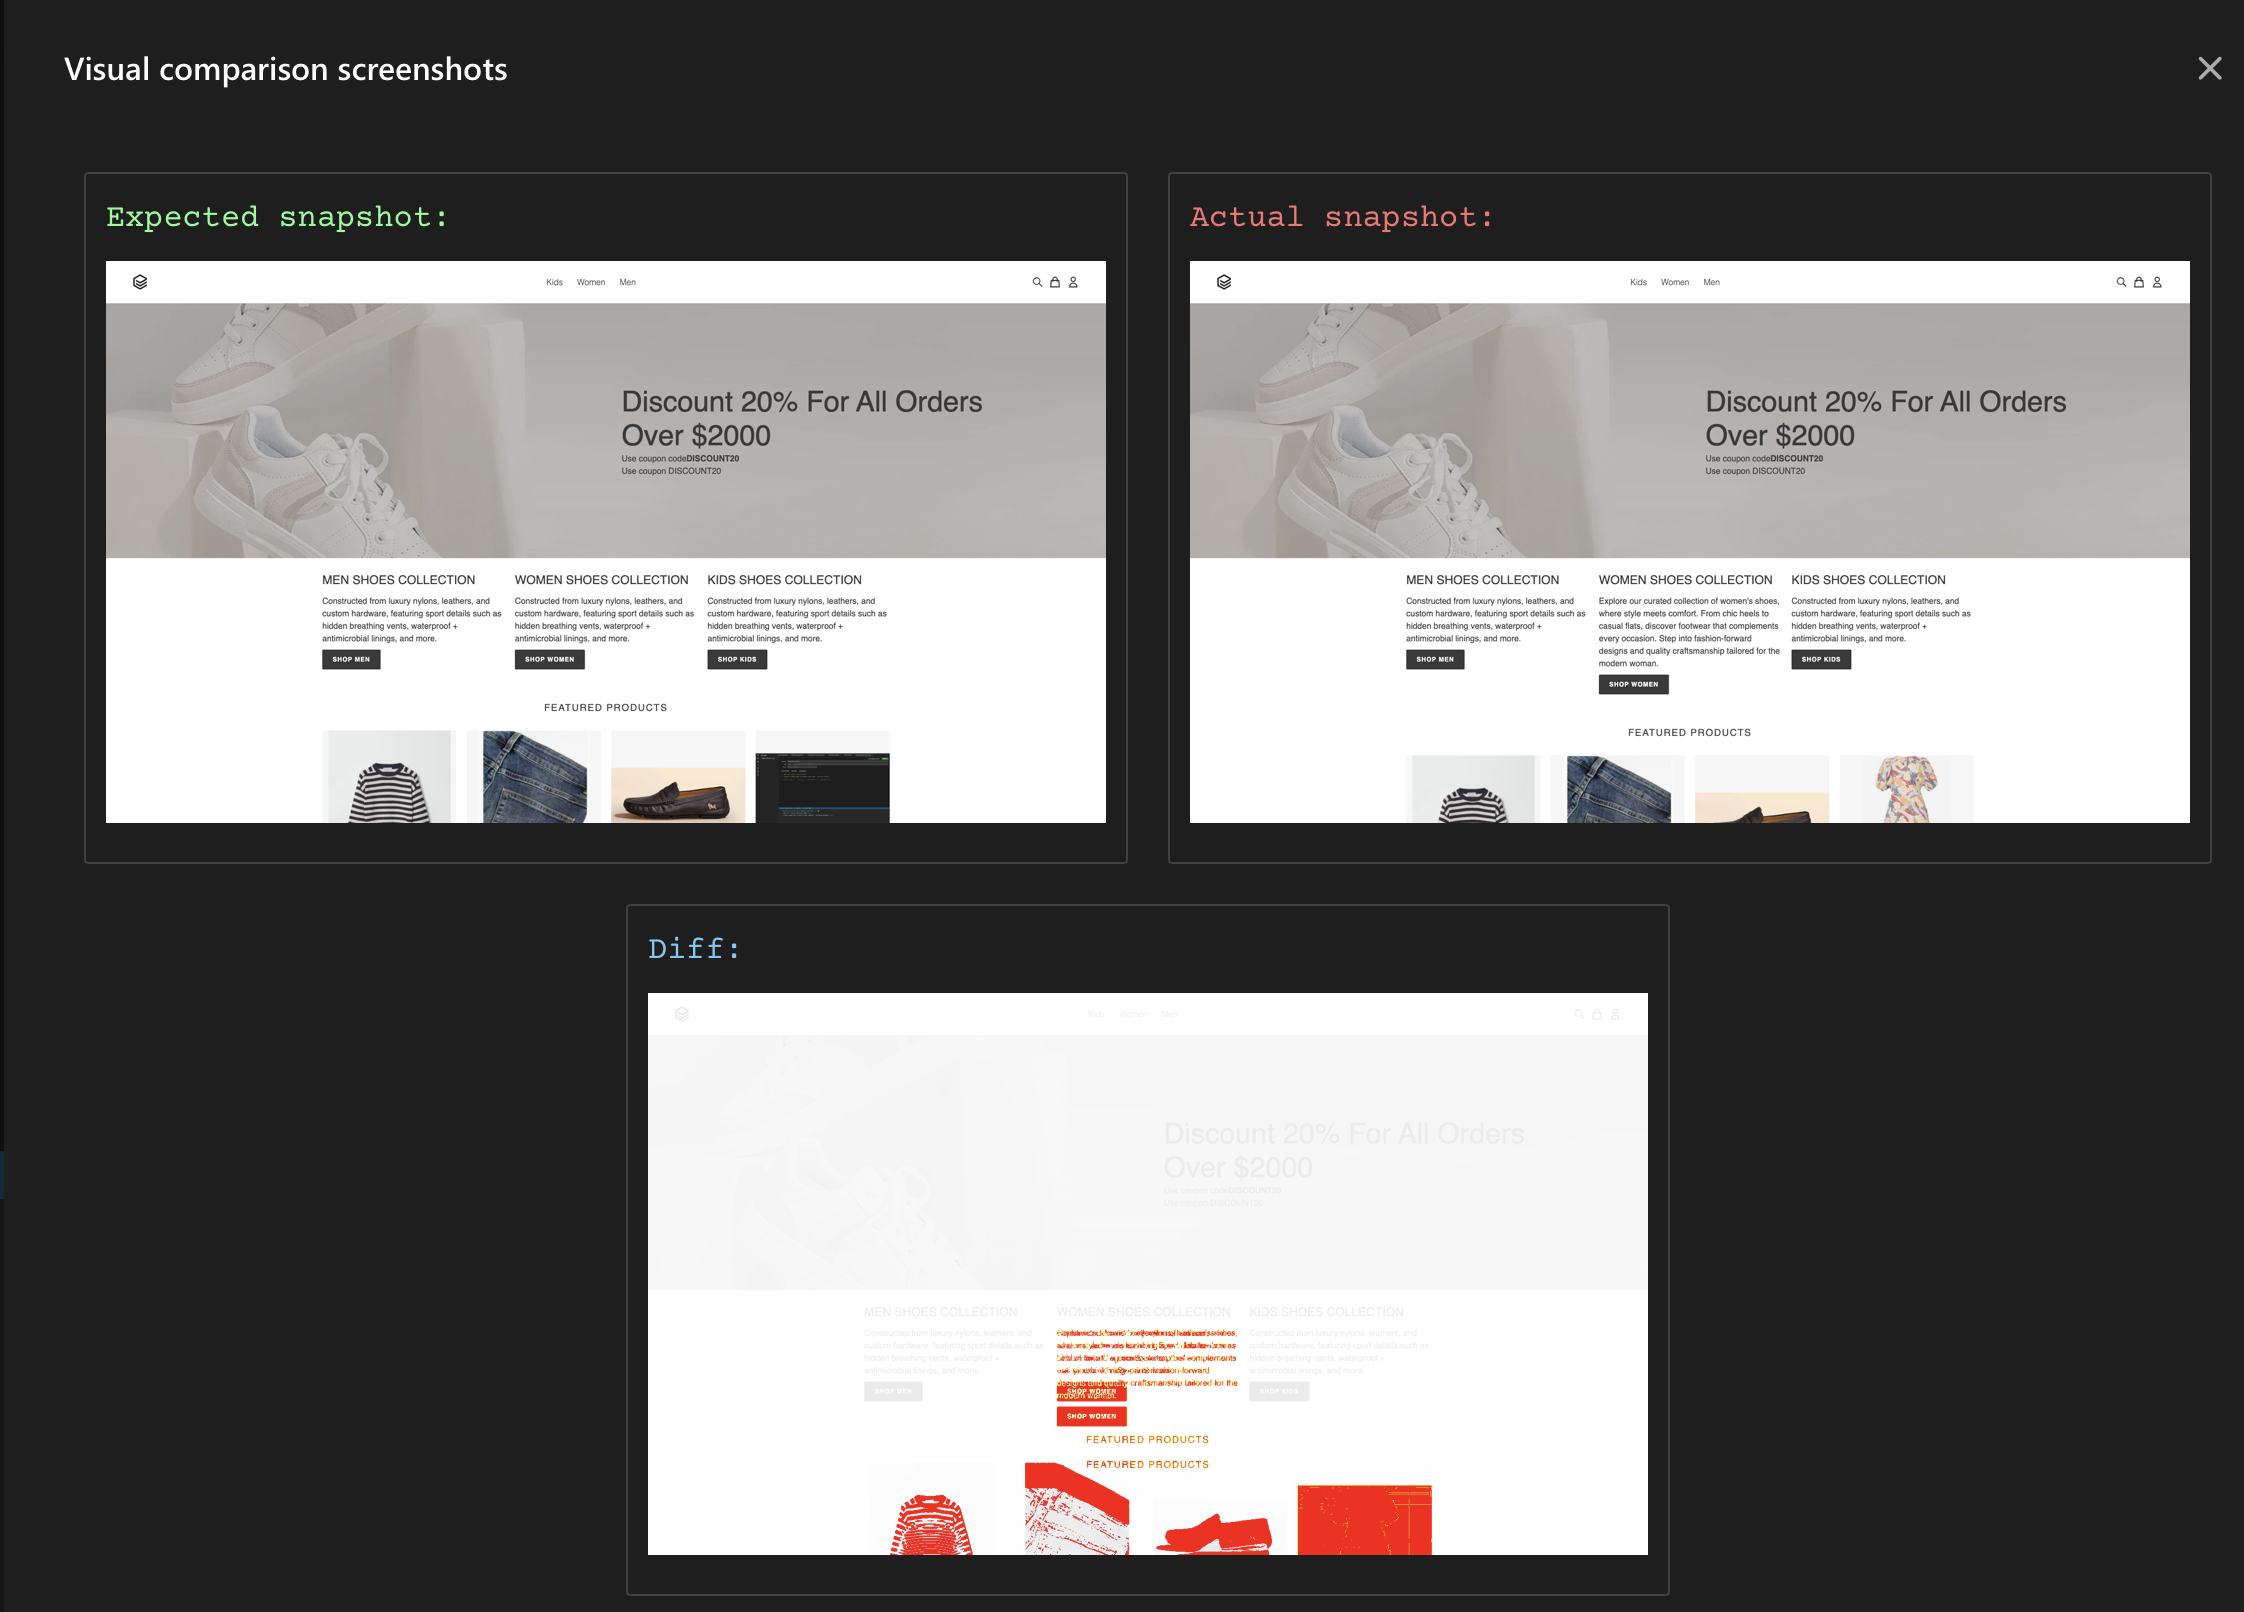
- In the event of a visual comparison failure, the View visual compare snapshots in the log panel will display both the expected (baseline) and actual screenshots, highlighting the areas of difference.

Verifying the page elements visually
- From the Automation tab in editor,click on Add Steps
- Select Visually compare page to (Element) to (snapshot) test action.
- Select the specific page element you want to visually verify and provide a label for the snapshot, which will be saved in the project folder.
- Similar to verifying the entire page, this snapshot acts as a baseline. Deviations from the baseline in following test runs will be reported.
Viewing Base Snapshots
-
Accessing the Snapshots
- Navigate to the "Manage Test Resources" section under Test Data in the side navigation.
- Locate and expand the "Visual Testing Snapshot" folder.
-
Viewing Snapshots
- The folder will contain all the base snapshots captured during the test run.
- Each snapshot is typically represented by an image file (e.g., PNG, JPG) with a descriptive filename.(label)
-
Managing Snapshots
- Right-click on a snapshot: This will display a context menu with the following options:
- Delete: Remove the selected snapshot.
- Rename: Change the filename of the snapshot.
- Duplicate: Create a copy of the selected snapshot.
- Show in Explorer: Open the file location of the snapshot in the operating system's file explorer.
-
Using Snapshots for Visual Testing
Base snapshots serve as a reference for visual regression testing. During test execution, DevAssure compares the current UI elements with the corresponding base snapshots. Any visual differences detected are flagged as potential issues, aiding in the identification of UI regressions and inconsistencies.
It is recommended to regularly review and update base snapshots to ensure accurate visual regression testing.